PostgreSQL installation and setup guide
Install PostgreSQL and pgAdmin 4
Go to https://www.postgresql.org/download and follow the link for your system.
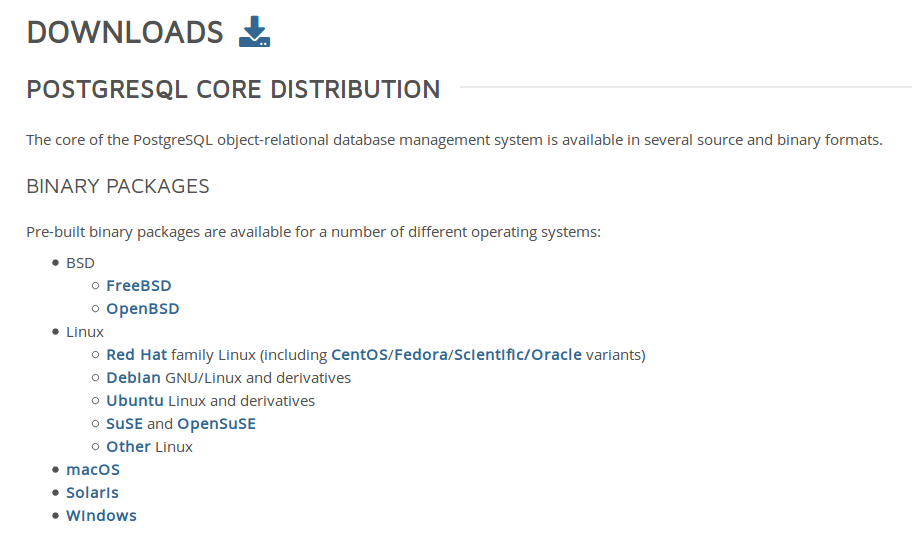
Windows / MacOS
For Windows and MacOS, there is an easy-to-use installer available (“Interactive installer by EnterpriseDB”), which includes all we need. During installation it should take care of everything (like setting a password for the superuser).
Ubuntu
For Ubuntu and other Linux-based systems, there’s a few more steps involved. Note that these instructions are specifically for Ubuntu, but should also work if you’re using a derivative of Ubuntu, e.g. Linux Mint.
The PostgreSQL and pgAdmin available in Ubuntu’s default repository are both old versions, so to get the most up-to-date versions, we need to add the PostgreSQL’s own repository to the software source list.
Create a sourcelist file for the repository (requires superuser):
sudo touch /etc/apt/sources.list.d/pgdg.list
Add the following line to the newly created file:
deb http://apt.postgresql.org/pub/repos/apt/ xenial-pgdg main
NB: the xenial part of that line depends on your version of Ubuntu.
Swap xenial for the appropriate version codename:
| Version | Codename |
|---|---|
| 14.04 | trusty |
| 16.04 | xenial |
| 18.04 | bionic |
Alternatively, you can check by running the following command:
lsb_release -c
Next, we need to import a signing key for the added repository and refresh apt’s content index:
wget --quiet -O - https://www.postgresql.org/media/keys/ACCC4CF8.asc | sudo apt-key add -
sudo apt-get update
Now we can install the programs:
sudo apt-get install postgresql pgadmin4
Configure PostgreSQL server
In order to use pgAdmin 4, the default superuser postgres needs to have a password set.
This happens during installation on Windows and MacOS, but must be done manually on Ubuntu.
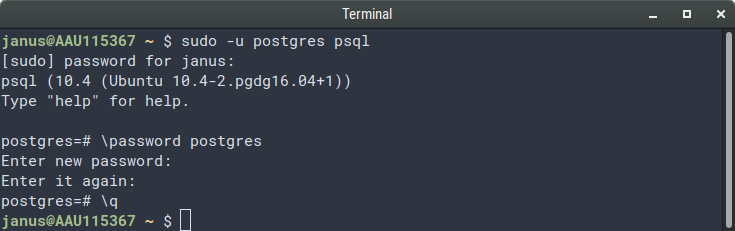
Run the PostgreSQL command line tool, psql, as the user postgres to get in:
sudo -u postgres psql
Set the password (it will prompt you to type one) and quit:
\password postgres
\q
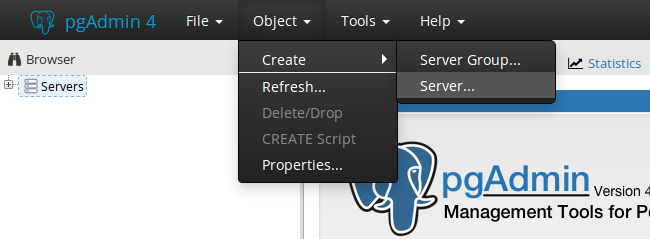
Once postgres has a password, run pgAdmin.
This will open a tab in your default web browser, as pgAdmin is implemented as a Python web app.
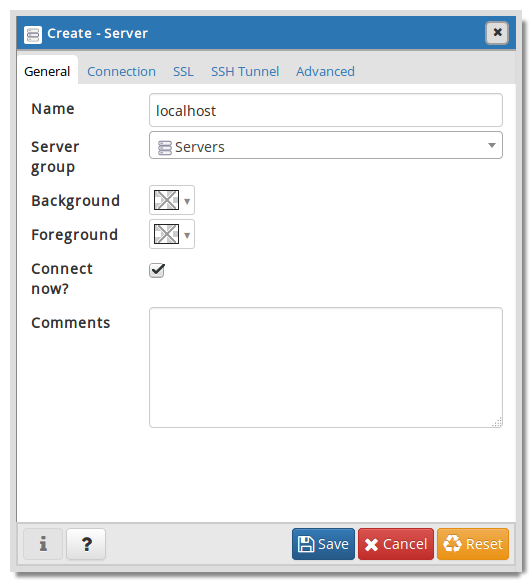
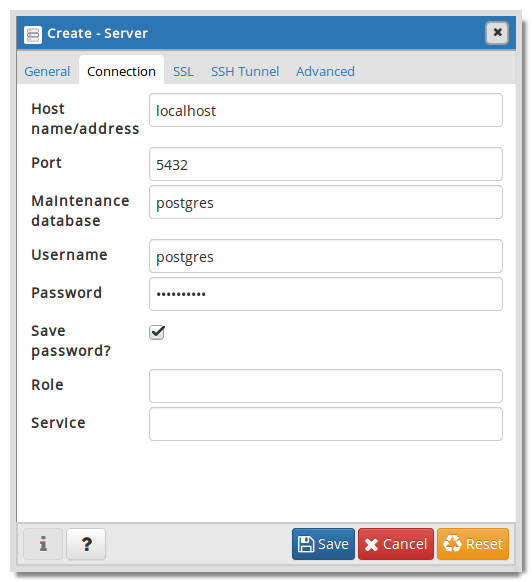
If the server localhost is not already available, add it manually:
Make sure you set the field hostname/address to localhost and supply the password for postgres from earlier:
If you get errors at this point, you might have to change some configurations to allow for certain kinds of connections to the PostgreSQL server that pgAdmin needs:
- Open the file
/etc/postgresql/XX/main/pg_hba.conf(whereXXis the version number, at the time of writing this was10; requires superuser) - Find the line describing local socket connections, it looks like this:
local all all peer - Change
peertomd5 - Find the line describing local loopback connections over IPv6:
host all all ::1/128 ident - Change
identtomd5 - Save and close
- Restart the PostgreSQL server:
sudo service postgresql restart
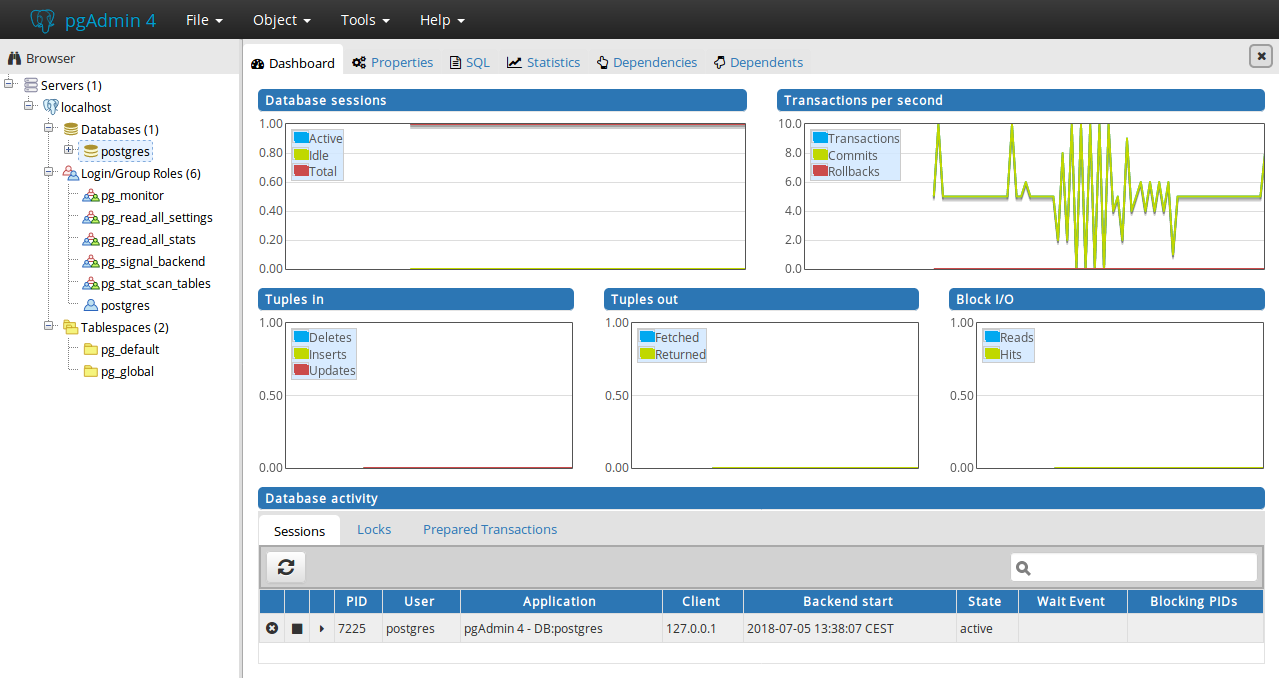
End result
If all goes well, you should have a screen that looks like this: